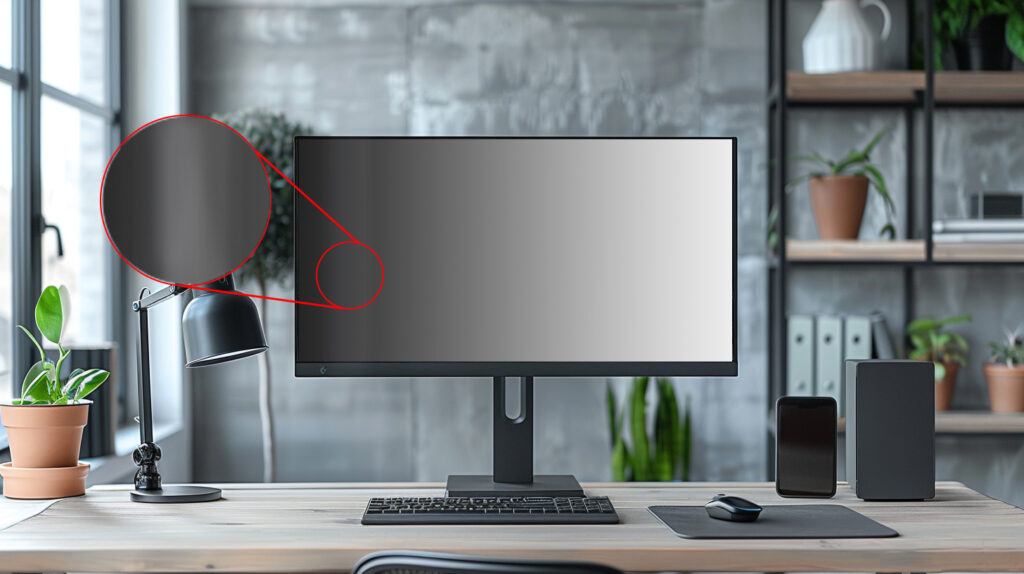
Banding (Gradient) Test for Monitors

gradeint test for screen

A gradient test (also known as a color banding test) helps you spot any issues with color transitions on your screen. When you run this test, it shows a smooth range of colors, allowing you to see if your display can handle the transitions without any noticeable lines or “banding.” It’s a quick way to check if your monitor is up to the task of showing colors correctly.

Start the Gradient Tests by clicking the “►” button in the test panel.

Test Pattern
Defective Pixels
Uniformity
Color Distances
Sharpness
Gradients
Gamma
Response Time
The functionality is not available for your screen width. The test can only be performed on a desktop monitor.

Explore our online display assessment tool.

This is especially vital for professionals in graphic design, photography, and video production, where color accuracy and visual integrity are paramount. Regular gradient testing helps maintain the quality assurance of digital displays, ensuring that the final content appears as intended across various devices.

Display Banding?

gradient test - banding display

Display banding, often referred to as color banding, is a visual artifact that appears on digital screens as distinct bands or stripes of color, which disrupt the smooth transition in gradient images. This phenomenon occurs when the screen’s color depth isn’t sufficient to render a seamless gradation between shades. It’s most noticeable in dark scenes or when a single color fades into another gradually. The main culprits behind display banding include limited color depth, poor compression algorithms, and suboptimal screen calibration.

Conducting a Gradient Test

Tools and Software Needed

To conduct an effective gradient test, you might use a variety of tools ranging from software applications to dedicated websites. Popular choices include color management and calibration software like DisplayCAL or online resources like alcolorscreen.com that provide test patterns specifically designed for banding detection.

Step-by-Step Guide

  1. Setup: Ensure that your monitor settings are reset to default or to a known calibration profile before starting the test.
  2. Choose a Tool: Select a gradient testing tool or software.
  3. Run the Test: Open the gradient test image or pattern. This usually displays a gradient ranging from black to white or through a spectrum of colors.
  4. Observe: Look carefully at the transitions between colors or shades. Note any abrupt changes or bands where the colors do not change smoothly.
  5. Adjust Settings: If banding is noticeable, try adjusting your monitor’s settings, such as brightness, contrast, or color depth. In some cases, changing the screen resolution or updating graphics drivers may also help.
  6. Re-test: After making adjustments, run the test again to see if there is an improvement. Repeat adjustments as necessary until the gradient appears smooth.

Latest post

my-screen-resolution

My screen resolution

Your Monitor Details: Resolution: Aspect Ratio: DPR (Device Pixel Ratio): Screen Size: Diagonal Size…

how to get wrinkles out of projector screen

How to get wrinkles out of the Projector Screen?

Nobody likes a creased screen, right? It’s like the first scratch on a brand-new car. So, let’…

One response to “Banding (Gradient) Test for Monitors”

  1. tlover tonet Avatar
    tlover tonet

    Thanks – Enjoyed this update, is there any way I can get an alert email whenever you write a new post?

Leave a Reply

Your email address will not be published. Required fields are marked *

Exit ↑↓
Check the monitor for any malfunctioning pixels. Each pixel should be showing black. If you notice any colored illumination within a pixel, it indicates a subpixel that is persistently lit.
Tap this screen to open the following screen
Verify whether there are any faulty pixels on the monitor. Every pixel ought to display white. If you observe a black pixel, it signifies a pixel that's absent.
Tap this screen to open the following screen
Verify for any malfunctioning pixels on the monitor. Every pixel ought to display in red. The presence of a black pixel signifies the absence of the red subpixel.
Tap this screen to open the following screen
Verify for any faulty pixels on the screen. Each pixel ought to emit a green hue. Should you come across a black pixel, it suggests the absence of the green subpixel.
Tap this screen to open the following screen
Verify for any faulty pixels on the monitor. Every pixel ought to display blue. The presence of a black pixel denotes the absence of a blue subpixel.
Tap this screen to open the following screen
Exit ↑↓
Evaluate the consistency of the image by employing different shades of gray. Ensure that brightness is uniformly dispersed throughout the entire image, with no presence of vibrant hues.
Tap this screen to open the following screen
Evaluate the consistency of the image by employing different shades of gray. Ensure that brightness is uniformly dispersed throughout the entire image, with no presence of vibrant hues.
Tap this screen to open the following screen
Evaluate the consistency of the image by employing different shades of gray. Ensure that brightness is uniformly dispersed throughout the entire image, with no presence of vibrant hues.
Tap this screen to open the following screen
Evaluate the consistency of the image by employing different shades of gray. Ensure that brightness is uniformly dispersed throughout the entire image, with no presence of vibrant hues.
Tap this screen to open the following screen
Exit ↑↓
Exit ↑↓
Lorem ipsum. Test Text.
Exit ↑↓
Exit ↑↓
Exit ↑↓
Exit ↑↓