How to Calibrate Your Screen

Imagine looking at your screen and seeing images so lifelike, it feels like you could reach out and touch them. That's the magic of properly calibrated screens. Whether you're a photographer whose photos must print perfectly, a designer crafting visuals that pop, or just someone who loves binging the latest series, screen calibration is your best friend. It's all about making sure what you see on your screen translates into the same quality in print, on a different device, or simply for your viewing pleasure.
So, what's screen calibration all about? Think of it as fine-tuning your TV or computer monitor to display colors, brightness, and contrast just like the pros intended. In the realm of photography, design, or even daily web browsing, an uncalibrated screen can be like looking at the world with sunglasses on. Colors might be off, the brightness could either blind you or hide the details in shadows, and don't get me started on the fuzzy texts or graphics! It's like trying to hit a bullseye with a wonky dart – you can get close, but it's not quite perfect. That's why getting your screen settings just right can make all the difference, turning your visual experience from meh to wow!
Also, read about Types of display technology
First things first, let's talk about setting the scene. You know, your screen is like a diva; it needs the right environment to give its best performance. So, dim those lights or close the blinds. You want to avoid any glare or reflections messing with your view.
Next up, give your screen a good spa treatment. A clean, dust-free monitor is a happy monitor. Grab a microfiber cloth and gently wipe away any smudges or dust particles. It's like prepping a canvas before painting your masterpiece.
Now, let's not forget about warming up. No, not you – your screen! Turn it on and let it warm up for about 30 minutes to an hour. This way, all the colors get to stretch out and be ready for action.
Last but not least, let's talk tech specs. Make sure your screen is flaunting its native resolution and optimal refresh rate. It's like putting on the right pair of shoes for a marathon – everything just works better.
Moving on to the main event – calibration! Did you know your computer is already equipped with some nifty tools to help you out? Yep, both Windows and macOS have built-in calibration tools just waiting to be used.
If you're team Windows, dive into the Control Panel and find the 'Color Management' settings. Mac users, you'll find your treasure in the 'Display' settings under 'System Preferences'. It's like having a secret weapon hidden in plain sight!
Now, let's play with the dials and sliders. Brightness, contrast, gamma – these are the levers that'll fine-tune your screen to perfection. Adjusting the brightness ensures you're not squinting or getting lost in the shadows. Tinkering with the contrast will make the whites whiter and the blacks, well, blacker. And gamma, that's the secret sauce for the perfect balance, making sure every shade is just right, from the darkest darks to the lightest lights.
When the built-in tools just don't cut it, it's time to bring in the big guns: hardware calibration tools, known as colorimeters, and their trusty sidekick, calibration software. These tools aren't just for show; they're precision instruments that can really dial in your screen's performance.
Here's how you get started:
Calibrating your screen isn't just about fancy gadgets; it's also about understanding what you're tweaking. Let's break down the settings you'll be working with:
It's all about the light. Too bright, and you're in glare city; too dim, and you might as well be in a cave. Aim for a brightness that feels comfortable and doesn't make you squint or strain.
This setting controls the difference between the darkest and the brightest parts of your screen. You want a balance where darks are deep and rich, but not so dark that you lose detail.
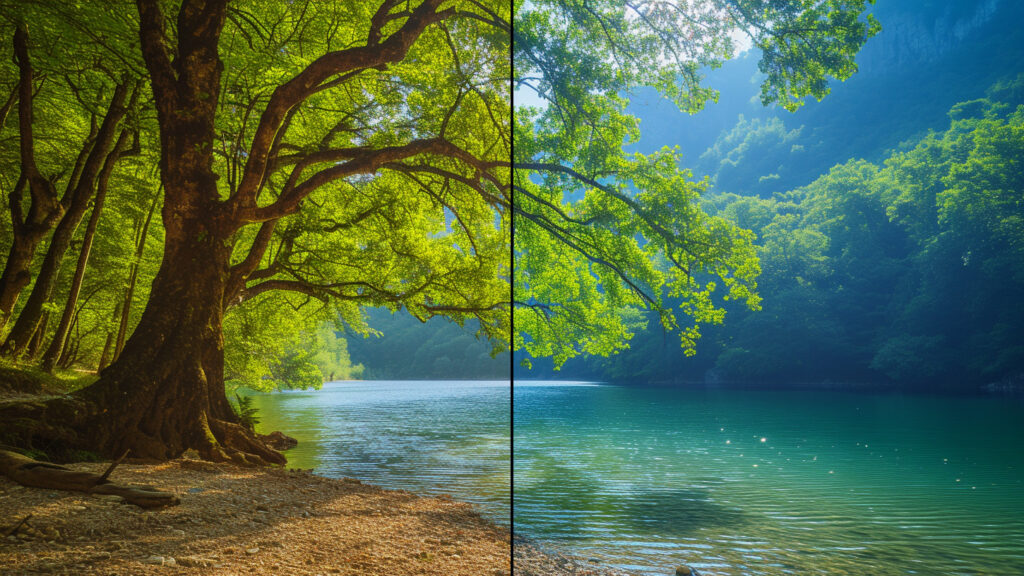
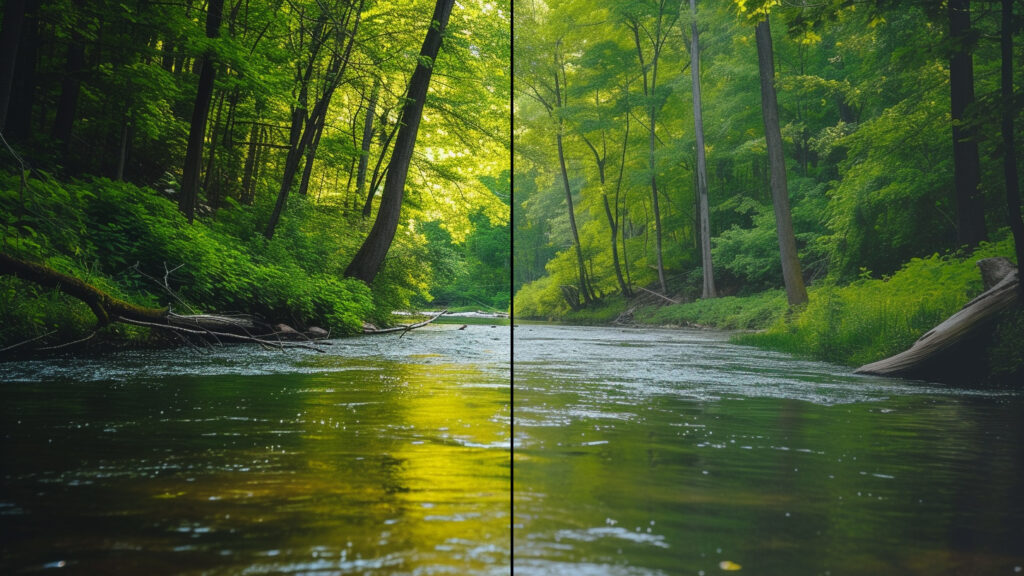
Color temperature sets your screen's mood. Warm tones for a cozy, relaxed vibe, or cool tones for crisp, focused work. Dial in your color temperature to make sure your screen's hue matches your task and ambiance, ensuring colors feel just right.
This one's a bit tricky. It controls the mid-tones of your screen, affecting how images and videos appear in terms of depth and detail. The standard gamma setting is usually around 2.2, but feel free to adjust if something feels off.
Sharpness is all about striking a balance. Too low, and your screen's a misty morning; too high, and you're in a neon outline world. Adjust the sharpness until the details are clear without the harsh outlines. Think of it as fine-tuning your visual clarity.
So, you've got your screen looking all spiffy and color-perfect. Awesome! But don't just set it and forget it. Like that trendy sourdough starter everyone's been fussing about, your screen calibration needs a little check-up now and then. Why? Well, monitors age like fine wine, except they don't get better with time. Colors can drift, and brightness can fade. And if you're someone who loves to chase the sunlight around your room (who doesn't?), remember, that changing ambient light can throw a wrench in your perfect setup.
Here's a pro tip: set a calendar reminder to recalibrate your screen every few months. It's like giving your screen a mini spa day. And if you're serious about color accuracy (looking at you, photographers and designers), consider investing in a calibration tool. It's like having a personal screen stylist on hand.
Calibration can sometimes feel like you're trying to solve a Rubik's cube, blindfolded. But fear not! Let's tackle a couple of common gremlins that might pop up. First off, those pesky profile-loading issues. If your computer acts like it's forgotten all your hard work, double-check that your calibration profile is set to load at startup. Sometimes, it's just a matter of reconfirming your preferences.
And about those color discrepancies—seeing funky hues where you shouldn't? It might be time for a heart-to-heart with your graphics card settings. Sometimes they like to override your calibration efforts because they think they know better. A quick trip to your graphics card control panel to make sure it's not playing the boss should do the trick.